我们先需要下载该软件:https://downloads.clash.wiki/ClashPremium/
然后解压文件:
shell
sudo apt install p7zip-full
7z x clash-linux-amd64-2023.08.17.gz我们先赋予执行权限,然后复制到系统的bin中,这样可以全局使用:
shell
chmod +x clash-linux-amd64
sudo cp clash-linux-amd64 /usr/sbin/
接着又两种配置方式:
方法1(从Windows获取)
在clash for windows: 
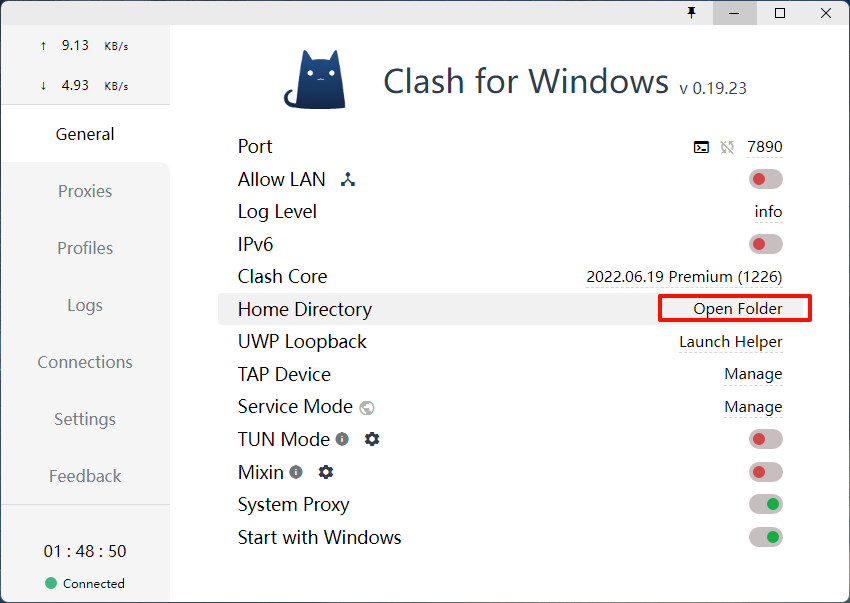

 外层的
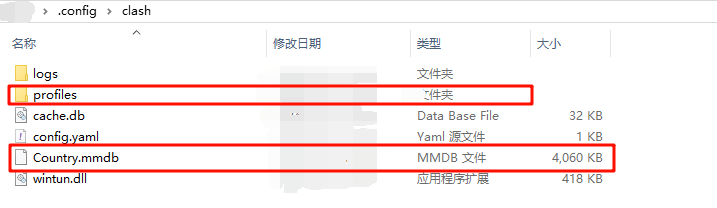
外层的Country.mmdb和profiles目录中有一个xxxx.yml 复制到Linux系统上,然后:
shell
mkdir -p ~/.config/clash
cp ./xxxx.yml ~/.config/clash/config.yaml
cp Country.mmdb ~/.config/clash/
然后执行:
shell
clash-linux-amd64

方法2(不推荐)
我们有订阅地址,需要下载配置文件:
shell
wget -O config.yaml "https://xx.xxxx.xxx/api/v1/client/subscribexxxx"下载到的文件一般是base64,我们需要将base64转换为明文,并且还需要做许多的操作。 具体可以参考:
url
https://docs.gtk.pw/contents/parser.html#%E7%AE%80%E4%BE%BF%E6%96%B9%E6%B3%95-yaml
https://github.com/InoryS/Clash-Parser-Online?tab=readme-ov-file#%E7%AE%80%E4%BD%93%E4%B8%AD%E6%96%87
https://github.com/SahanY099/clash_subscription_parser/tree/main
https://github.com/GongT/clash-subscription-processor/tree/master
https://wiki.metacubex.one/config/
配置
字数
516 字
阅读时间
3 分钟
我们可以通过网站:https://clash.razord.top/#/settings进行配置: 
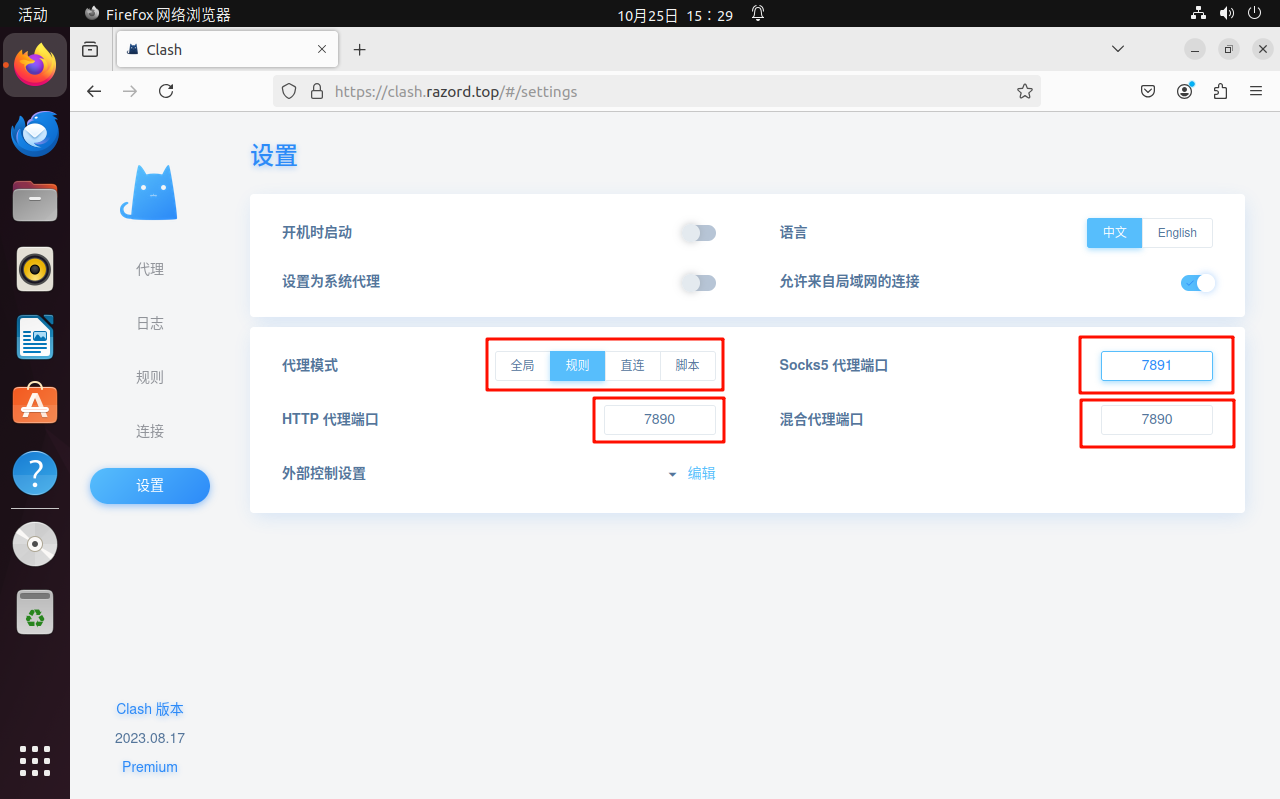

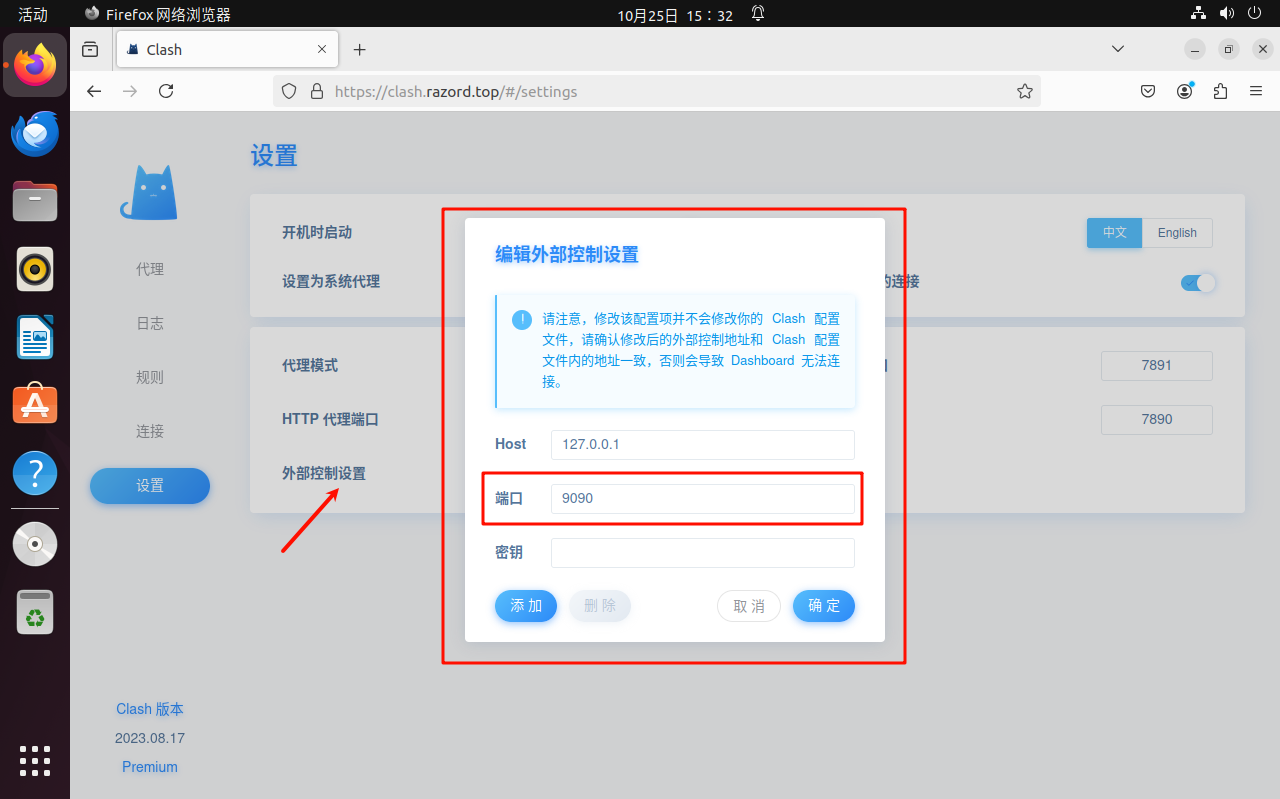

 注意外部控制设置,设置用与后台一致就行,一般不需要设置,错误的话可能导致无法打开该网页。 接着设置代理:
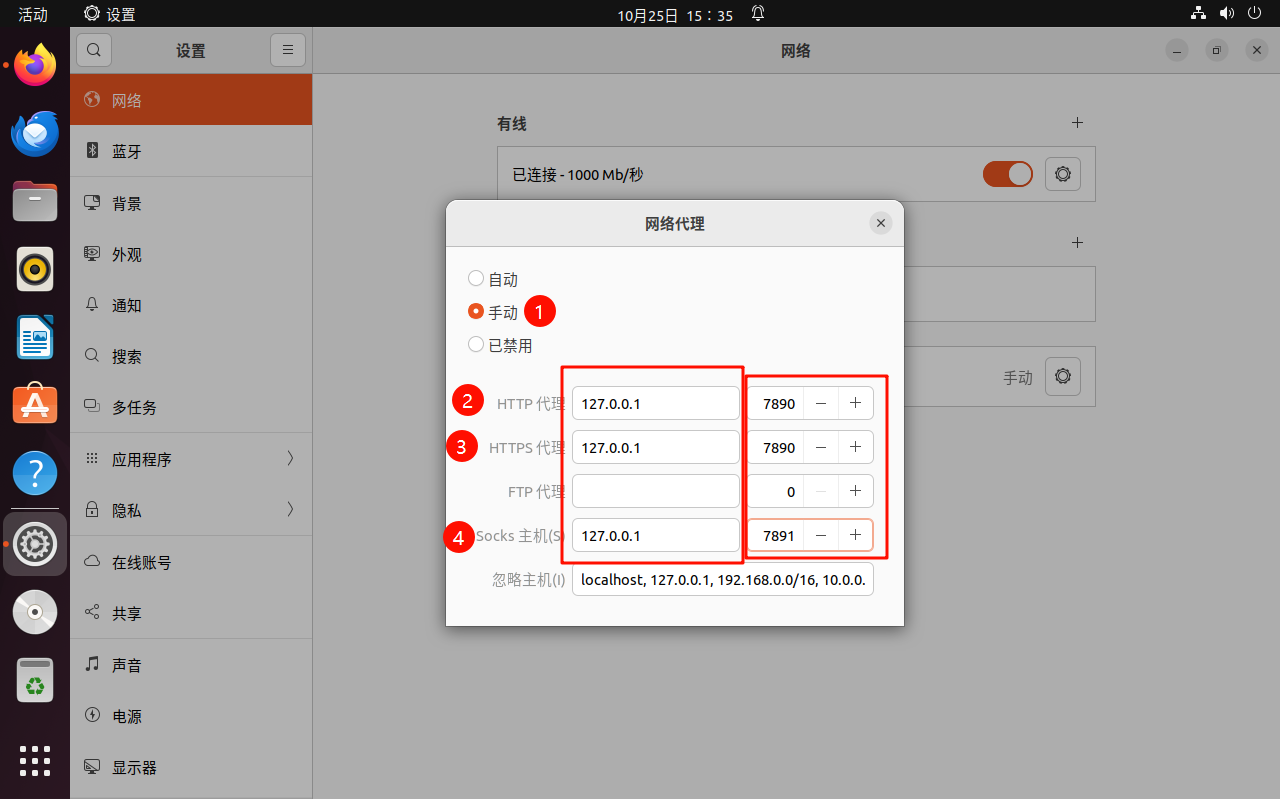 然后就OK了。 你也可以通过在
.bashrc中添加:
shell
export http_proxy='http://127.0.0.1:7890'
export https_proxy='http://127.0.0.1:7890'
其他
当然你可以可以选择clash-verge这中自带界面的。
贡献者
 Px
Px